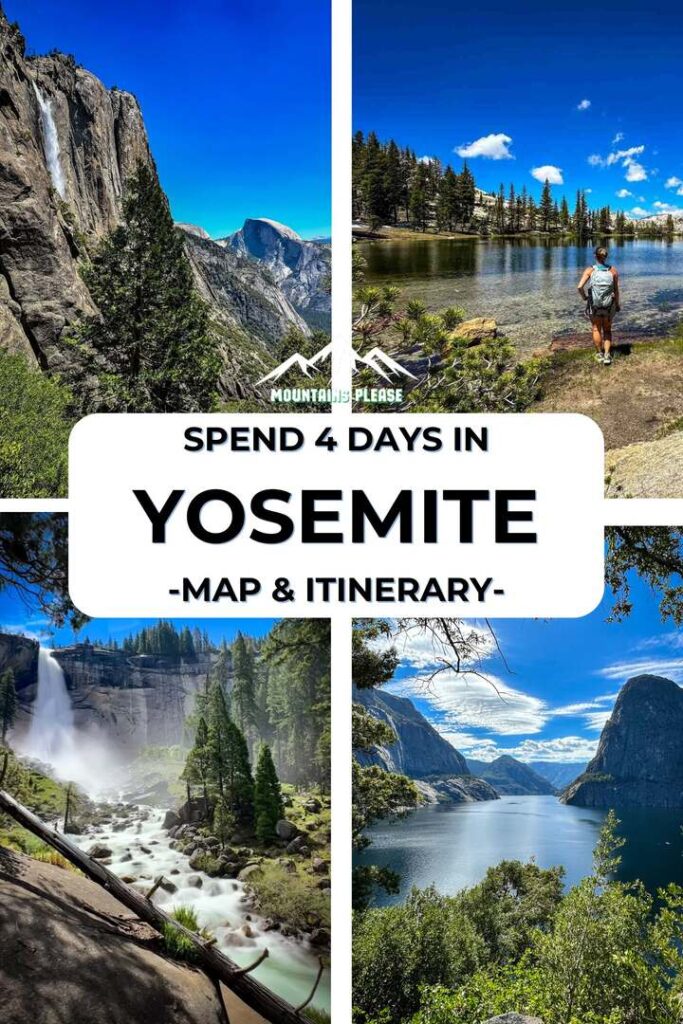

Itinerary for Yosemite National Park: 4 Days of Epic Hiking
Planning an itinerary for Yosemite National Park? You’ve landed in the right place. Yosemite is one of the most iconic national parks in the world, and one of the most visited. Spending 4 full days here means you can go well beyond the Valley floor crowds and experience the park the way it’s meant to be seen.
Spend some time at the top of a 2,425-foot waterfall, above the clouds at 10,000 feet in Tuolumne Meadows, soaking wet on the Mist Trail, and finally, in the peaceful quiet of Hetch Hetchy, where most visitors never bother to go.
We visited Yosemite as part of our 16-day California national parks road trip. 4 days was exactly the right amount of time, and we came away with some of the most memorable hiking experiences of our lives.
Yosemite ranks among the very best national parks in the U.S. Here’s exactly how to plan your own 4 day Yosemite itinerary, day by day.
This post may contain affiliate links, which means I’ll receive a commission if you purchase through my links, at no extra cost to you. Please read our full disclosure for more information.
Best Time to Visit Yosemite National Park
Late spring through early summer is our top recommendation. We visited in mid-June, which was close to perfect. Here’s a quick seasonal breakdown:
Spring (April–May): Waterfalls are at their most powerful as snowmelt peaks. Yosemite Falls, Vernal Falls, and Nevada Falls will be thundering. Trails at higher elevations may still have snow, but the Valley is accessible and spectacular.
Summer (June–August): The most popular time to visit, and for good reason! Nearly everything is open and accessible. That said, crowds are at their peak, especially on weekends. Getting to trailheads early is non-negotiable. During our visit, the weather was sunny and 70°F-90°F depending on elevation. Tuolumne Meadows was cool and crisp even in June.
Fall (September–October): Crowds thin dramatically after Labor Day, and the temperatures are perfect for hiking. The downside is that waterfalls are reduced to a trickle by August, while Yosemite Falls can be nearly dry by late summer.
Winter (November–March): Yosemite blanketed in snow is breathtaking, but many roads close, including Tioga Road (which accesses Tuolumne Meadows) and Glacier Point Road. If winter is your only option, the Valley is still accessible and genuinely stunning.
Itinerary For Yosemite National Park At A Glance
Here is a quick table with an overview of what your Yosemite National Park itinerary could look like. For our recommendations on exactly where to stay, keep reading.
| Day 1 – Upper Yosemite Falls & Yosemite Point | Rest in Midpines/Mariposa, CA |
| Day 2 – Cathedral Lakes & Tuolumne Meadows | Rest in Midpines/Mariposa, CA |
| Day 3 – Mist Trail: Vernal & Nevada Falls | Rest in Midpines/Mariposa, CA |
| Day 4 – Hetch Hetchy: Wapama Falls | Rest in Midpines/Mariposa, CA |
| Closest Airports | San Francisco International (SFO), Oakland International (OAK), Fresno Yosemite International (FAT) |
The map above includes a day-by-day itinerary at Yosemite National Park. Sometimes it helps to see a visual overview and a map to help plan your route and adventures.
Planning Your Itinerary for Yosemite National Park
Getting There
The most common gateway airports for Yosemite are San Francisco International (SFO) and Oakland International (OAK), which are both about 3-4 hours from Yosemite Valley, depending on traffic. Oakland is often cheaper and less congested, and it’s where we recommend checking first.
Fresno Yosemite International (FAT) is worth checking if you can find a good fare because it’s about 1.5 hours from the south entrance of the park and significantly closer than the Bay Area airports, though it does have fewer direct flight options.
Traffic warning: Highway 99 and CA-120 toward Yosemite can get extremely congested on summer Friday afternoons and Sunday evenings. Build buffer time into your arrival and departure days. We always recommend arriving mid-week if your schedule allows.
A rental car is essential. There is no practical way to reach the trailheads on this itinerary without one. Book your rental car early, especially for summer travel when availability gets tight around both Bay Area airports. Compare prices at Booking.com or Expedia and lock in your car the moment your dates are confirmed.
Entrance Fees & Passes
Yosemite National Park charges an entrance fee. If you’re visiting multiple national parks, and on our Central California road trip, you will be, the America the Beautiful Pass covers Yosemite, Sequoia, Kings Canyon, Pinnacles, and every other national park for one year. It pays for itself on this trip alone. Pick one up on our gear page at REI before you leave home.
2026 Entry: No Timed Reservation Required
Yosemite National Park will NOT use timed entry reservations in 2026. You can drive in without a reservation during regular park hours. That said, parking in Yosemite Valley fills up extremely fast in summer. Plan to arrive before 7 am to guarantee a spot, park once, and use the free shuttle system for the rest of the day. Once you’re parked, do not move your car. Trust us on this one!
The Shuttle System: Please Use It
Yosemite Valley has a free shuttle system that makes getting between trailheads, visitor centers, and lodging genuinely easy:
- Valleywide shuttle: All stops in Yosemite Valley, including lodges, restaurants, campgrounds, and trailheads. Runs every 12-22 minutes from 7 am to 10 pm.
- East Valley shuttle: Yosemite Village, Curry Village, Pines campgrounds, and eastern Valley trailheads. Runs every 8-12 minutes from 7 am to 10 pm.
Upper Yosemite Falls Trail starts at Camp 4 near Shuttle Stop 7. The Mist Trail starts at Happy Isles near Shuttle Stop 16. Lower Yosemite Falls is Shuttle Stop 6. Using the shuttle removes the parking stress entirely.
Food & Gas
There are many food options in Yosemite Valley, including the Village Store, Yosemite Valley Lodge Bar & Restaurant, Curry Village dining, and several grab-and-go options. There is NO gas in Yosemite Valley. The nearest stations are:
- El Portal Market (west of the Valley): 9 am–7 pm
- Crane Flat Gas Station (north of the Valley): Open year-round, 24hr pay-at-pump
🚗 Check prices and options for rental cars at Expedia or Booking.com. Book now!
Bear Safety & Food Storage
Black bears are active throughout Yosemite. Do not leave food in your car, not even sealed containers in your trunk. Yosemite bears have learned to recognize coolers, grocery bags, and even fast food wrappers through car windows.
Failure to store food properly can result in a $5,000 fine and/or impoundment of your vehicle. Use the bear boxes at trailheads and your accommodation’s food storage lockers. Learn more about bear safety at Yosemite here.
Cell Service
Coverage in Yosemite Valley is generally good. As you head to Tuolumne Meadows (Day 2) and Hetch Hetchy (Day 4), service drops to slow or nonexistent. Download offline maps before leaving the Valley each morning. AllTrails or HikingProject (our fave!) works well for this.
Poison Oak
Poison oak is present throughout the park, particularly on lower elevation trails. Here’s what it looks like. Learn to recognize it before you go.
🏡 Find a place to stay now on VRBO. 4 days in Yosemite calls for a place of your own!
Day 1 – Upper Yosemite Falls

- Shuttle stop: Camp 4, Stop 7
- Distance: 8 miles round trip
- Elevation gain: 3,300 feet
- Difficulty: Strenuous
Start your itinerary for Yosemite National Park with one of the oldest trails in the park and a view of North America’s tallest waterfall. The Upper Yosemite Falls Trail climbs 2,425 feet from the Valley floor via relentless switchbacks. It’s dusty, dry, fully exposed in the upper section, and absolutely worth every painful step.
We won’t sugarcoat it: this hike is hard. One of our 3-liter water bladders was empty halfway down. Bring more water than you think you need, start before 7 am, and mentally prepare for 60+ switchbacks.
What you get in return is jaw-dropping views of Half Dome and the Valley from Columbia Rock, the thundering brink of Upper Yosemite Falls, and finally, Yosemite Point, which is one of the most spectacular viewpoints in the entire park! Half Dome, The Lost Arrow Spire, and Eagle Peak are all visible at once.
After the descent, hop the shuttle to Lower Yosemite Falls for a flat 1-mile loop that gives you a stunning ground-level view of both upper and lower falls. A great way to end a big day on your legs.
🏞️ Get the complete step-by-step guide to Upper Yosemite Falls and Yosemite Point here
Day 2 – Cathedral Lakes & Tuolumne Meadows

- Trailhead: Tuolumne Meadows Visitor Center, off Tioga Road
- Distance: 9-10 miles round trip
- Elevation gain: 1,000+ feet
- Difficulty: Moderate (note: starting elevation is 8,500 feet)
Day 2 takes you out of the Valley entirely and up into a completely different world through the high country of Tuolumne Meadows, where granite peaks rise from open subalpine meadows, and the air is thin enough to slow your pace whether you expect it to or not.
The hike to Upper and Lower Cathedral Lakes follows the famous John Muir Trail from the Tuolumne Meadows Visitor Center. Lower Cathedral Lake appears first at about 3.5 miles. It’s a pristine alpine lake reflecting Cathedral Peak in the kind of glassy water you only find above 9,500 feet. Upper Cathedral Lake is another half mile beyond, smaller and more dramatic, tucked against the granite walls.
Fair warning: starting at 8,500 feet feels noticeably different than hiking at Valley elevation. Take it slower than you think you need to, especially in the first mile.
After completing this hike, stop at Tenaya Lake and Olmstead Point along Tioga Road. Olmstead Point in particular offers one of the most unusual perspectives of Half Dome you’ll find anywhere in the park, seen from entirely the wrong angle in the most wonderful way.
Day 3 – Mist Trail, Vernal & Nevada Falls

- Shuttle stop: Happy Isles, Stop 16
- Distance: 6.3 miles loop
- Elevation gain: 2,000 feet
- Difficulty: Strenuous
Day 3 is the most popular hiking day in Yosemite! The Mist Trail to Vernal and Nevada Falls is one of the greatest hikes in all of the national parks, and the Mist Trail section alongside Vernal Fall is unlike anything else.
A granite staircase built into the cliff face beside a thundering waterfall, close enough that you will get completely soaked whether you want to or not. In June, this is one of the most exhilarating experiences in the park.
Hike up via the Mist Trail, the spray-soaked granite stairs beside Vernal Fall, and then continue the extra mile to Nevada Fall, which drops 594 feet and is significantly less crowded than Vernal, despite being equally spectacular. We thought it looked like a movie set.
The view from the top of Nevada Fall, looking back down the valley, is one of our favorite moments from our entire California trip. Return via the John Muir Trail for a drier descent and a different perspective.
End your day with two quick stops: Bridalveil Fall, a short, easy walk to Yosemite’s most graceful waterfall, and Tunnel View, the classic overlook of Yosemite Valley that you absolutely cannot skip. The light in the late afternoon here is worth planning around.
One tip we can’t emphasize enough: hike up via the Mist Trail, not down. The granite steps alongside the waterfall are extremely slippery when wet. Going up is challenging; going down is actually dangerous due to a slip hazard.
💧 Get the complete Mist Trail and Vernal/Nevada Falls guide here
Day 4 – Hetch Hetchy

- Trailhead: O’Shaughnessy Dam, Hetch Hetchy Reservoir
- Distance: 5 miles out and back
- Elevation gain: 460 feet
- Difficulty: Easy
The final day of your Yosemite itinerary takes you somewhere most visitors never bother to go, and that’s exactly why we love it. Hetch Hetchy sits in the remote northwestern corner of Yosemite, about 1.5 hours from the Valley, and has no shuttle, no crowds, and a wilderness feel that’s almost entirely absent from the rest of the park.
Start by crossing O’Shaughnessy Dam and walking through the Hetch Hetchy Tunnel, which is one of the more surreal experiences in any national park.
The trail then hugs the edge of the Hetch Hetchy Reservoir, a controversial man-made lake that flooded what was once considered the equal of Yosemite Valley itself.
The hike to Wapama Falls passes through oak woodland and blooming wildflowers before arriving at a footbridge drenched in spray from the falls. In early summer, the flow can be powerful enough to require careful footing on the bridge.
It’s a quieter, contemplative way to end four days in Yosemite. It’s a reminder of how vast and varied this park really is.
After the hike, head north toward the San Francisco Bay Area, where wine country and Muir Woods await on the next leg of the California journey.
Where to Stay During Your 4 Day Yosemite Itinerary
Booking a place to stay is one of the most important things to do early for a Yosemite itinerary. Options inside the park book out 6-12 months in advance for peak season dates. This is not an exaggeration! Set a reminder and book the moment your travel dates are confirmed.
Inside Yosemite Valley: book as early as humanly possible:
- The Ahwahnee, a National Historic Landmark, the most iconic hotel in the park. Stunning architecture, nature views, a heated pool, and shuttle access. If you can get a room here, take it.
- Yosemite Valley Lodge, perfect for families and groups, is close to Lower Yosemite Falls and the shuttle.
- Curry Village, hotel rooms, cabins, and canvas tent cabins. Plenty of nearby food options and a lively atmosphere.
Outside the park: our home base:
We stayed in the Midpines/Mariposa area for our 4 days, and it worked extremely well. About 1 hour from Yosemite Valley, this area has reliable, affordable hotels and puts you on the right side of the park for Days 1, 3, and 4.
- VRBO – our top pick for a stay near Mariposa and the Yosemite Valley, but there is a drive into the park each morning. However, it will be cheaper than park lodging. Find a place to stay now.
- Best Western Plus Yosemite Way Station Motel – clean and comfortable, with a variety of breakfast options. Book your stay on Expedia or Booking.com.
- Miners Inn – breakfast included, pool. Good value and clean. Check it out on Expedia or Booking.com.
- Browse all Mariposa options on Expedia or check out the other options near Yosemite Valley.
Frequently Asked Questions
How many days should I spend at Yosemite National Park?
Four days is our sweet spot. It gives you one day for each of the major experiences: Upper Yosemite Falls, Cathedral Lakes, the Mist Trail, and Hetch Hetchy. If you only have 2-3 days, prioritize the Mist Trail to Vernal and Nevada Falls and Upper Yosemite Falls as your non-negotiables, and add Cathedral Lakes if you have a third day.
Do you need reservations to enter Yosemite in 2026?
No. Yosemite is not using timed entry reservations in 2026. You can drive in without a reservation. That said, parking in Yosemite Valley fills up fast in summer, so aim to arrive before 7 am, park once, and use the free shuttle system for the rest of the day.
What is the hardest hike in this Yosemite itinerary?
Upper Yosemite Falls to Yosemite Point on Day 1. It’s 8 miles with 3,300 feet of elevation gain, and mostly exposed to full sun on the upper switchbacks. We rate it as the most physically demanding. The Mist Trail on Day 3 is also strenuous at 2,000 feet of gain, but shorter and more varied. Cathedral Lakes on Day 2 is deceptively tiring due to the 8,500-foot starting elevation.
Is Yosemite worth visiting in summer despite the crowds?
Yes, with one essential strategy: start early every single day. We arrived at the parking areas before 7 am and had no issues. By 11 am, lots were full, and chaos had arrived. The hiking itself is spectacular regardless of season, but summer waterfall volume (especially in June) is unbeatable. The Mist Trail in July without significant snow melt is a very different and lesser experience than in June.
Can you do Yosemite without camping?
Absolutely! We did not camp. This entire 4-day itinerary is designed for non-campers. We stayed in Mariposa and drove in each morning. All the hikes on this itinerary start from day-use trailheads accessible by car or shuttle. Not a single tent required.
Is a 4 Day Itinerary for Yosemite National Park Worth It?
Yes, you can’t miss Yosemite! It deserves every bit of praise it’s ever received. The views from Yosemite Point stopped us both mid-step. The granite staircase beside Vernal Fall in full June flow is something neither of us will ever forget. We were soaked!
Hetch Hetchy on a quiet Wednesday morning, with the reservoir shimmering and the falls thundering in the distance, felt like we had the whole park to ourselves.
Four days lets you experience the full range of what this park offers, including the Valley floor icons, the high country solitude of Tuolumne Meadows, the thundering waterfalls of the Mist Trail, and the quiet wilderness of Hetch Hetchy.
One or two days scratches the surface. Four days start to reveal the depth. We’d go back for another four in a heartbeat!
🛌🏽 Don’t forget to check out Expedia and book your hotels, and if you like this itinerary, check out some of our other ones here!
Don’t forget to pin this post for future planning! Just click the save button located on any image.